Recently, we migrated our host from HostGator to BlueHost. why? Will soon come up with the reasons in upcoming post. I experienced the effort that should be put to move a website to another Hosting provider and I can say it’s not an easy task!

Without wasting much time let us move to the steps involved in moving a web hosting. This is a step by step guide to migrate web hosting without downtime.
Note : continue the steps on your own risk.
We are concerned with two web hosting servers – old and new. We are considering wordpress site in our post. But the steps are similar for all other sites.
Backup Database
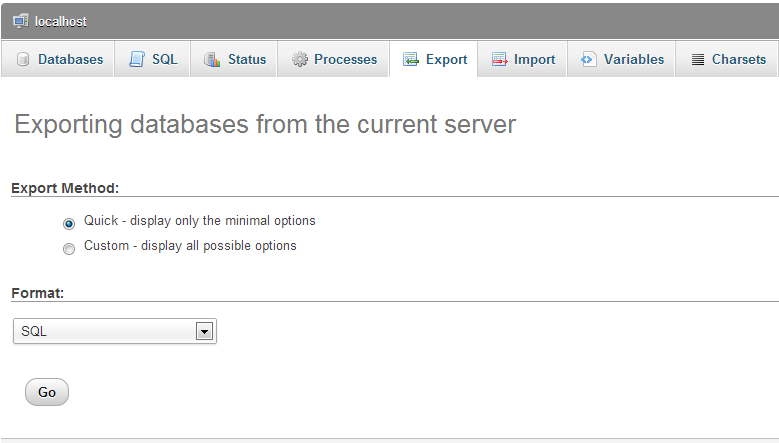
The first step is to backup database, where all the content and important data of the site is stored. To backup a database open your old web hosting account and follow the steps:
- Move to phpMyAdmin.
- Select the database and click export to get a copy of database.
Now you have a copy of a database. Make sure to compare the size of the database downloaded and the database in server.
Install fresh Copy of wordpress

As already mentioned, we are considering wordpress site. Most web hosting providers support 1 click script installer, which can install wordpress within a few seconds. So, it’s better to have a fresh wordpress installation instead of moving all the files to a new server. But, make sure to compare both the versions of wordpress, i.e. the version already installed in the old server and the version you just installed in the new server.
Move wp-content folder
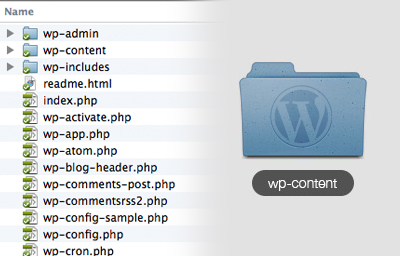
Wp-content folder is a part of wordpress installation which stores or includes all themes, script and plugins. Take a backup of wp-content folder from old server by compressing the wp-content folder and download the compressed folder. You can also use FTP software to download wp-content folder from old server.
Upload the wp-content folder in root directory of a new server and replace all the existing files.
Important Files
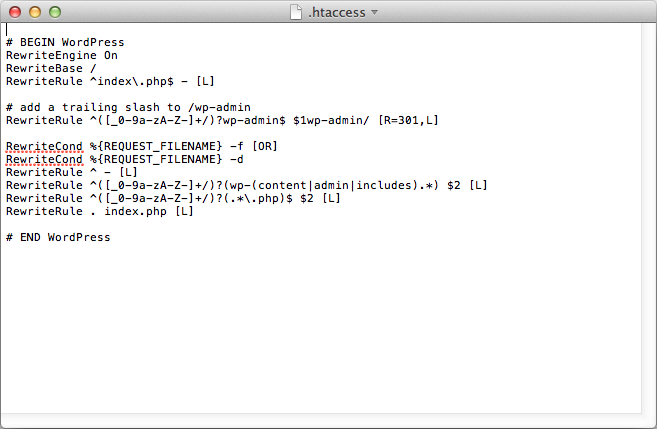
Take a backup of .htaccess which can be located in the root folder of your old server. HTAccess file store the permalink used by wordpress. Apart from htaccess you should copy all the important file such as, xml file if you are using XML sitemap and other important files and upload them to new server root directory.
Upload the database
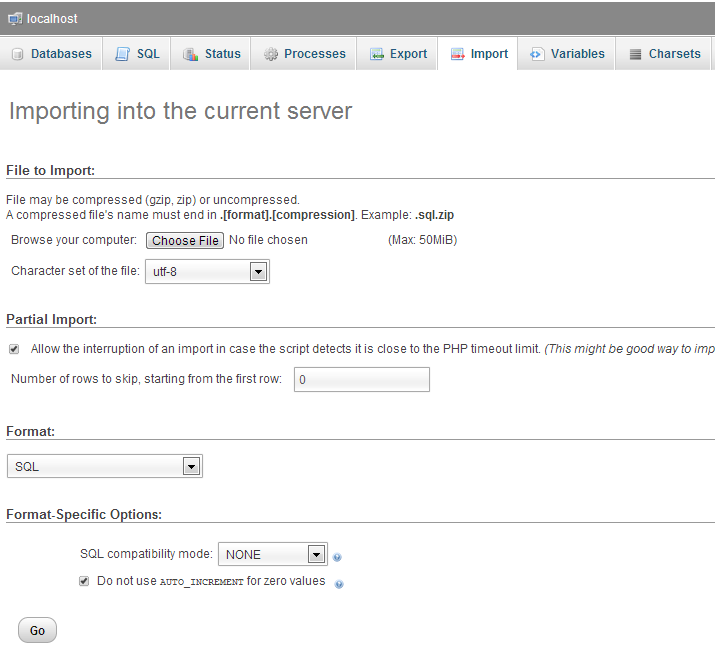
Upload the copy of database which was obtained from the first step. To upload the database follows the steps:
- Move to phpMyAdmin of new server.
- You can find a database created by wordpress.
- Select that database and delete all the tables.
- Now click on import and select the backup copy of database from the location on your computer to restore the database.
Congrats, you have successfully restored the database. But, wait it’s not enough. Open your wp-config file and compare the database table prefix that must look similar to
$table_prefix = ‘wp_’;
with the set of starting characters of tables name in the database. “wp_” is the default table prefix used by wordpress. If you find a difference, update the table prefix in wp-config file.
Testing Phase
All set, now test the website. To test the website before DNS Update, you can use the ip address of the server with your username. The temporary web address would look similar to the example –
http://123.345.567.89~username
If you are getting any error, recheck the steps. If not, Continue to the last step. Promise the last one!
Update the DNS
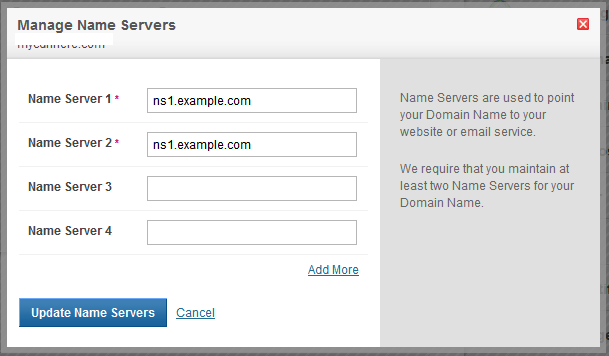
Yup, the last step, update the DNS (Domain Name Server) from the domain registrar. The Name server will be provided by the new hosting provider. Still confused? Check the welcome mail from the new hosting company or contact them.
Visit the company website where you registered the domain and change the Domain Name Server. Whoa, all steps are done!!
The DNS change requires 48 hours to fully update the DNS worldwide. The process is globally known as DNS propagation.That means the visitors can either load the site from old or new server randomly. As we promised to change the server without down time, We did it.
But, wait! if you want to update the website, which means either adding or removing content before DNS propagation, there is no guarantee, the content will be updated in which server. We request for one smaller step to be followed. Visit old hosting panel and edit the DNS records. You will find a ‘A’ record file with your domain name that must be pointing to your old server ip address. Change the IP address to new server IP address. Use TTL to 3600 which is equal to 15 Minute. In 15 min, your old server will redirect all request to a new server. Still DNS will be updated in 48 hours so, keep the files and database in old server intact and don’t break up with old server until DNS propagation!
If you get stuck in any step or have any queries, don’t forget to wake me up by your comments!!


Great post anand.
Awesome step by step guide.